
How to send command to switch page on SmartDisplay via CANopen
Preface
So far, when the system integrates and promotes SmartDisplay products, the focus is more on introducing its own features and functions, and less on how to operate SmartDisplay products from the perspective of client host control. This article uses switching pages as an example to simulate how the client host issues command to display for switching pages.
Introduction
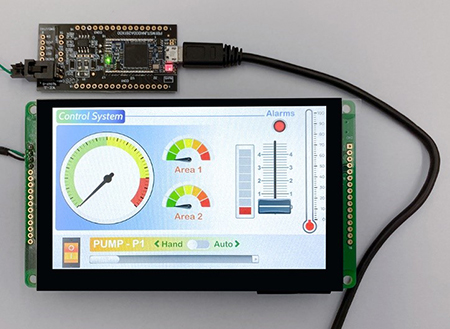
This application will take a 5-inches high-brightness standard product as an example. The system interface is divided into two parts: simulation and implementation using CANbus. It explains how to use GUI Builder to understand how to create a project and change the pages, and finally understand the process of changing the pages through the generated LOG and how the instruction was given.
Simulation
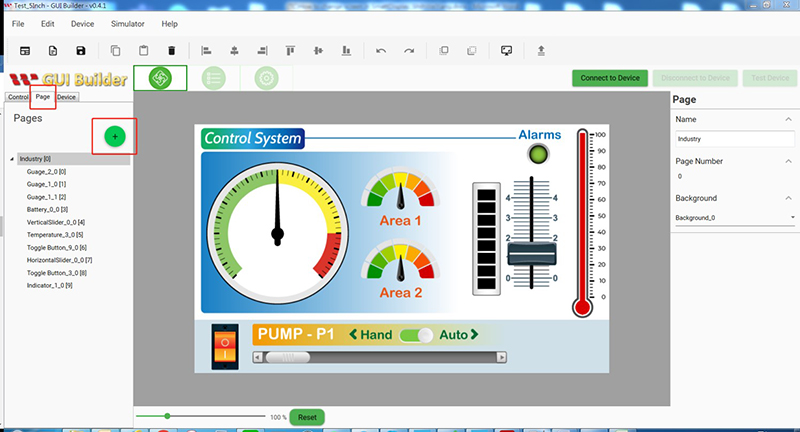
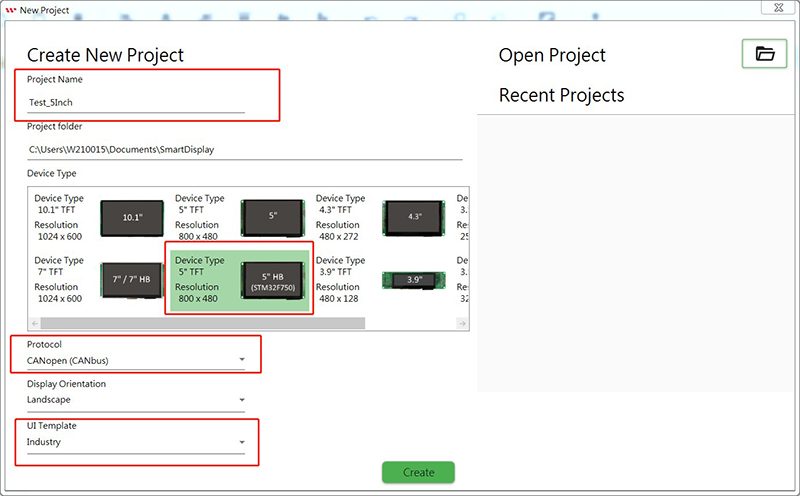
1-1 A 5-inches SmartDisplay is used in this example, run GUIBuilder to create a new project, give the project name and select the 5-inches display type in highlighted template, select CANbus for the protocol, and select Industry for the application scenario.

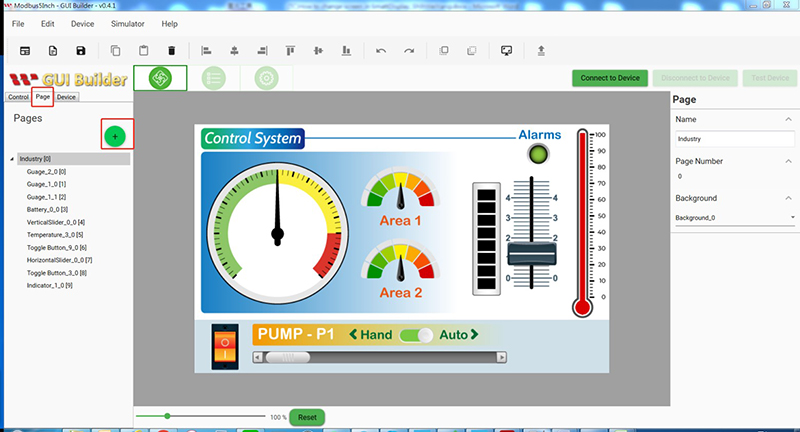
1-2 Select page and click “+” to add a new page
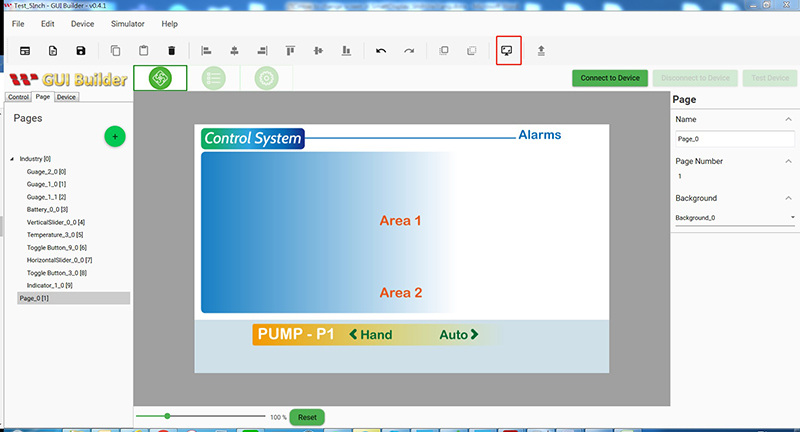
1-3 Click on the simulator icon.
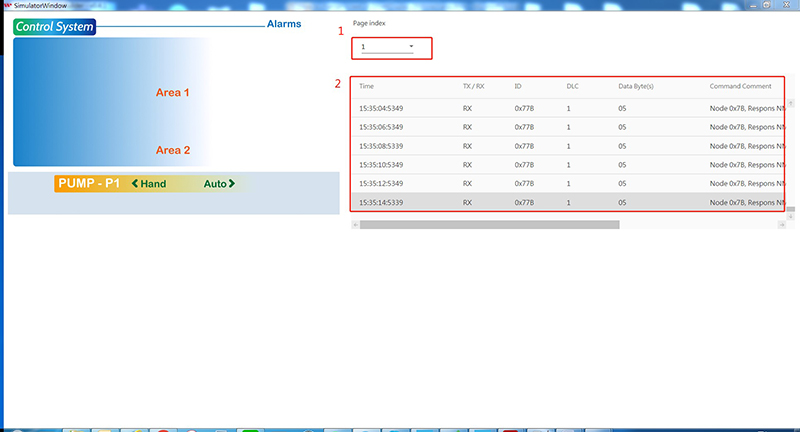
1-4
1.After entering the simulation window, click the page option. Currently, there are only two pages, 0 and 1. Click 1 to change it with another page.
2.You can see the LOG below, click the right button to export the EXCEL file.
1-5
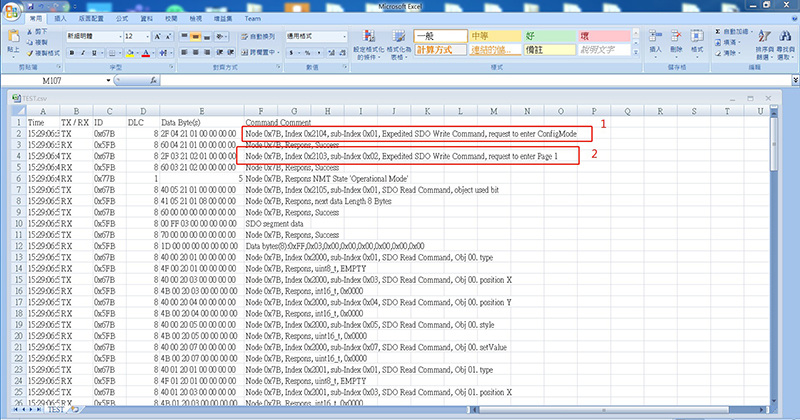
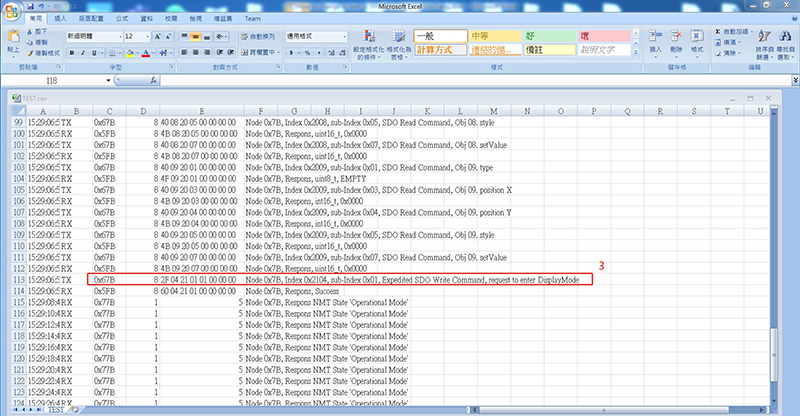
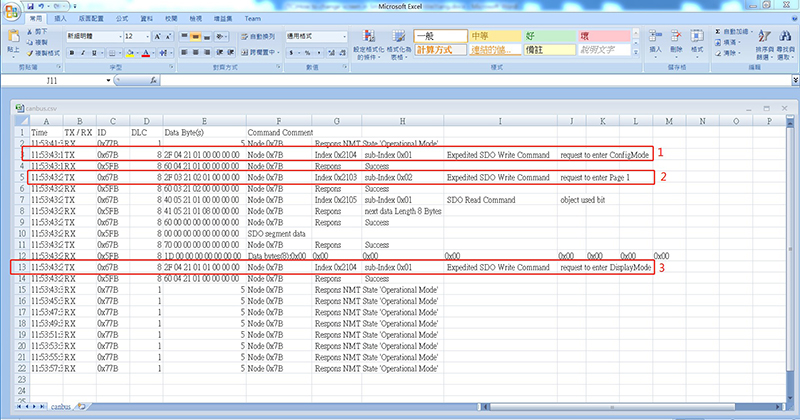
1.It can be seen from the LOG that at the beginning HOST will give Index0x2104, sub-Index 0x01 data request to change the mode to ConfigMode.
2.Next will give Index0x2103, sub- Index 0x02 request to switch PAGE to page 1
3.Finally, the information of Index0x2104 and sub- Index 0x01 will be requested to change the mode to DisplayMode.
Practice
1-1Enter the implementation phase, a 5-inch high-brightness SmartDisplay module must be prepared. Connect the SmartDisplay's system interface CANbus to the USB2CAN Dongle, run GUIBuilder again, open the above simulated template or create a new project according to the following procedures and connect SmartDisplay.
1-2 Select page and click + to add a new page.
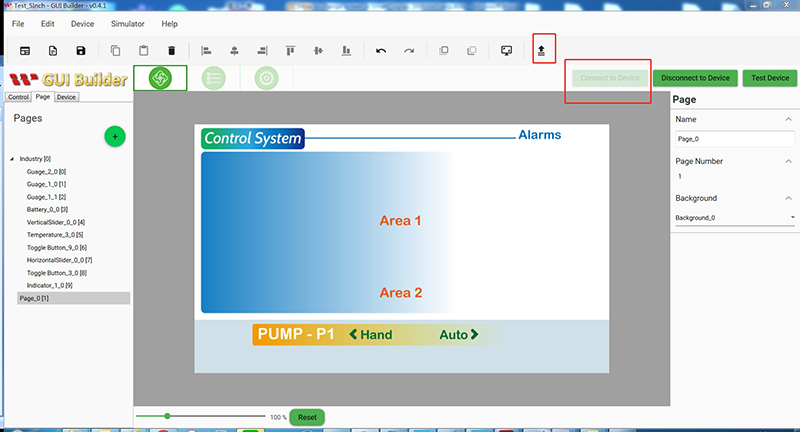
1-3 After clicking Connect to Device, select upload the project.
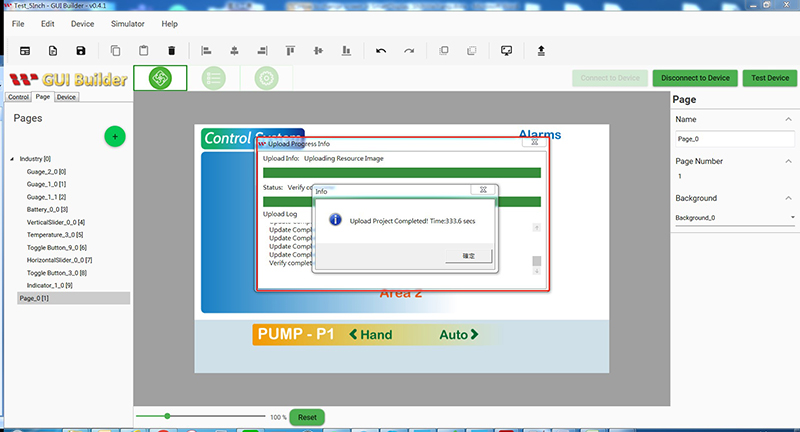
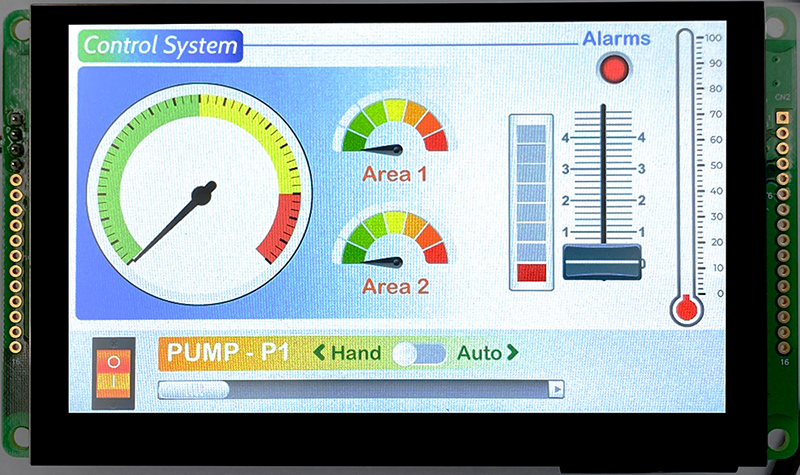
1-4 The following message will appear when the update is successful, and the module screen is as follows.
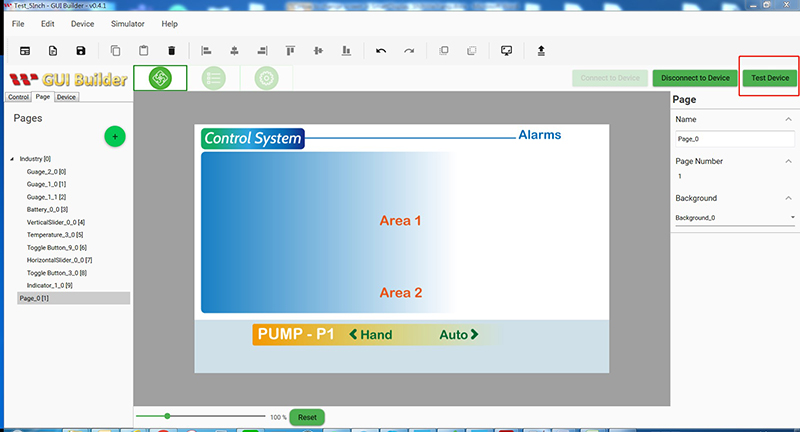
1-5 Click Test Device to enter the test screen
1-6 Enter the test account as shown below

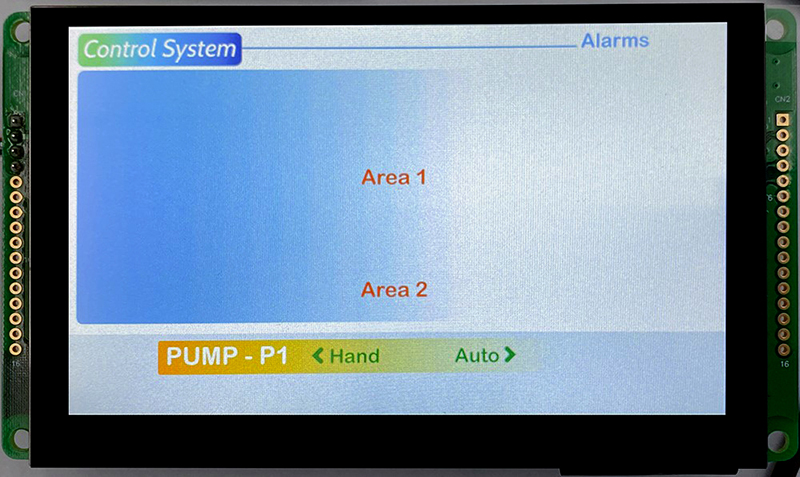
1.Page menu selection 1 (page 1) module on the screen as follows
2.Right-click on the Log to export the excel file (Log file)
1-7
1.From the log, we can know that at the beginning, the Host will give the information of Index0x2104 and sub-Index 0x01, which requires changing the mode to ConfigMode.
2.Next, Index0x2103 and sub-Index 0x02 will be requested to switch PAGE to page 1.
3.Finally, the information of Index0x2104 and sub-Index 0x01 will be requested to change the mode to DisplayMode.
Conclusion
Through the operation and simulation on GUI builder of switching paging, users can become more familiar with the diversity of Smart Display. The simulation functon is not only convenient to use, but also they can understand how the data is transmitted by receiving and sending commands Through the data log. Users can understand the meaning of data received and sent, and allow users to design their own Host-side controllers.
